How to Texture a Wall in Singapore
Let’s face it—blank walls are boring. If you’ve ever stared at the plain, flat surfaces of your HDB flat or condo, wondering how to add some life to your space, it might be time to texture a wall. In Singapore, where space is precious and every design choice counts, wall textures are the secret weapon that turns average into art.
Whether you’re dreaming of rustic charm, chic industrial vibes, or a modern luxe finish, learning how to texture a wall can seriously transform your interior, and it’s easier than you think. Also, LS Painter Singapore offers the best residential painting, house painting, and commercial painting services in Singapore.
Why More Singaporeans Are Choosing to Texture Walls
Singapore’s weather has a personality of its own—humid, tropical, and wildly unpredictable. And guess what? Your walls feel it, too.
Flat-painted surfaces might look good at first, but over time, they’re vulnerable to peeling, damp patches, and all the joys of indoor humidity. Textured walls don’t just mask those flaws—they turn them into design features.
Beyond durability, homeowners across the island are using textured walls to:
- Make small rooms feel more layered and luxurious.
- Add dimension to feature walls in living rooms and bedrooms.
- Soften harsh lighting with shadow play.
- Replace traditional wallpapers with a more permanent, tactile solution.
- Done right, when you texture a wall, you create a space that feels curated and lived-in, even if it’s your first renovation.
Step-by-Step: How to Texture a Wall the Smart Way
You don’t need a design diploma or an interior stylist on speed dial. You just need the right tools, a bit of planning, and a willingness to roll up your sleeves. Here’s your no-nonsense guide on how to texture a wall in Singapore.
Step 1: Choose Your Texture Style
The first question to ask yourself: What vibe are you going for?
- Cement Screed Finish – Raw and industrial. Think café-style, downtown loft, or minimalist haven.
- Venetian Plaster – Sleek and sophisticated. Ideal for feature walls in condos or landed homes.
- Knockdown or Orange Peel Texture – Casual and modern. Perfect for subtle charm in bedrooms or studies.
- Brushed or Swirled Patterns – Great for rustic or Mediterranean-inspired interiors.
Before you commit, think about how much light your room gets, how often it’s used, and how bold you want the wall to be. In Singapore’s compact apartments, even a small texture treatment can make a big impact.
Step 2: Prep Like a Pro
No shortcuts here—good prep makes or breaks the finish.
- Scrape off flaky paint and wipe down any grime.
- Patch cracks and smooth out rough spots.
- Apply a quality primer. If your wall is prone to dampness (hello, tropical weather), use a mould-resistant one.
Skipping prep is like building on a weak foundation. The texture might look good at first, but it won’t stay that way.
Step 3: Mix and Apply Your Texture Material
Depending on your texture style, you’ll either use joint compound, plaster, or a specialty wall texture mix.
- For the cement screed, you will likely have to mix cement with bonding agents and apply it using trowels.
- For DIY-friendly textures like knockdown or sponge effects, pre-mixed compounds from local hardware stores like Horme or Selffix are perfect.
Work in small sections, especially if you’re new to this. Singapore’s climate can make materials dry quicker than expected, so it pays to move methodically.
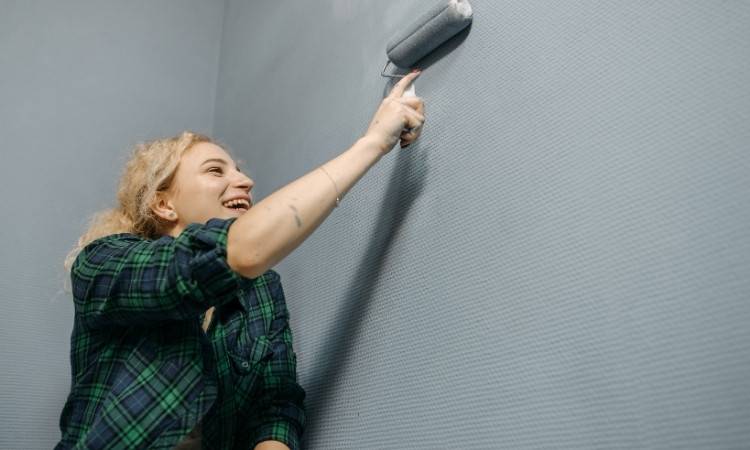
Step 4: Add Texture to a Wall with Technique
Now comes the creative part. The tools you use will define your final look.
- Sponge Dab – Dab and twist for a soft, cloud-like texture.
- Brush Stroke – Dragging a stiff brush gives linear, rustic patterns.
- Trowel Movement – Swirl, layer, and play with depth to create an artistic finish.
If you’re hiring a professional, this is where their skill shines. But don’t underestimate a determined DIYer with a steady hand. Plenty of homeowners in Singapore have pulled off stunning feature walls with basic tools and a weekend off.
Step 5: Let It Dry, Then Seal the Deal
This part requires patience. Allow your texture to fully dry before sealing. Dry time varies, but with Singapore’s humidity, it can take 24 to 48 hours, or more if ventilation is poor.
Once dry, lightly sand any high ridges and apply a sealant to protect the texture from moisture, dust, and wear. A matte or satin sealant works well for most finishes.
And just like that, you’ve added both form and function to your interior—without breaking the bank or tearing down walls.

Where to Get Tools and Materials in Singapore
Singapore has no shortage of hardware and home improvement stores where you can find everything you need for Texturing a Wall in Singapore:
- Home Hardware – For cement-based products and heavy-duty tools
- Selffix DIY – Ideal for beginner-friendly materials and hand tools
- Lazada / Shopee SG – Great for niche rollers, stencils, and design kits
If you’re working on your first wall, start small. Even a modest 2m x 2m section in your living room can change the entire feel of your space.
How Much Does It Cost to Texture a Wall in Singapore?
Price depends on size, material, and whether you’re DIY-ing or hiring a pro.
- DIY: Expect to spend $60–$150 on compound, tools, and sealants for a small wall.
- Professional Job: The charging rate for contractors ranges between $6 and $18 per square foot based on the selected materials and project intricacy.
- Interior Designers: Custom texturing can go higher, especially with imported products or unique artistic finishes.
If you’re watching your wallet, prioritize one feature wall—say, behind your bed or in the dining area—to maximize visual impact without overspending.
Conclusion
When you texture a wall, you’re not just decorating—you’re designing with depth, personality, and purpose. Whether you’re chasing the raw elegance of cement screed or the sophistication of polished plaster, adding texture transforms a wall from background to center stage.
In Singapore, where home spaces need to be both beautiful and efficient, textured walls deliver that rare balance—a style that works. So take the leap. Texture your wall. Create something that reflects not just your design taste but the way you live.